No edit summary Tag: Visual edit |
No edit summary |
||
| Line 1: | Line 1: | ||
| − | At the start of the level you will find either 2 or 3 "david" zombies. (the amount of zombies relies on how many players playing currently) Then you will go into the library where G told them (James and Gary) to meet him. |
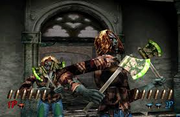
+ | [[File:G_THOTD2.jpg|thumb|G in chapter 1]]At the start of the level you will find either 2 or 3 "david" zombies. (the amount of zombies relies on how many players playing currently) Then you will go into the library where G told them (James and Gary) to meet him. |
| − | It doesn't look like G is there until you defeat 5 or 6 zombies and the players move further into the library. G is always found wounded, crouching behind a desk. As G is handing over his "file", (his guide to all the bosses) an axe zombie bursts through the door and attacks them. |
+ | It doesn't look like G is there until you defeat 5 or 6 zombies and the players move further into the library. G is always found wounded, crouching behind a desk. As G is handing over his "file", (his guide to all the bosses) an axe zombie bursts through the door and attacks them.[[File:Johnnys.png|thumb|Johnnys in Chapter 1]] |
| − | After defeating the "axe zombie", (johnny) you go outside the library when you find you find yet another "johnny" zombie killing a civillian. (note that the civillian '''cannot''' be saved) You can also see a david zombie in the background, it can be killed using one bullet only. After killing the civillian, The Johnny zombie attacks you and after killing him, (Johnny) |
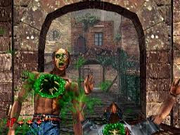
+ | After defeating the "axe zombie", (johnny) you go outside the library when you find you find yet another "johnny" zombie killing a civillian. (note that the civillian '''cannot''' be saved) You can also see a david zombie in the background, it can be killed using one bullet only. After killing the civillian, The Johnny zombie attacks you and after killing him, (Johnny) the civilian he kills makes one final quote stating that he doesn't want to die. Though he dies a second later... |
| − | This part makes you start having to save civillians from zombies. The first one is a woman being chased by a "Steve" zombie. (a david with a smaller head, a blue jacket, more health and the fact that he "karate chops" you) After killing the Steve, you will turn to the left to see a man being attacked by another Steve and two Davids. On saving him, he will show you the way out of the garden of the library, on letting him be killed by the zombies, They will turn around and attack you. The woman is seen crying behind James and Gary. James or Gary states that they couldn't help the man even though they clearly could, but chose not to. |
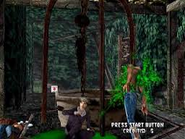
+ | This part makes you start having to save civillians from zombies. The first one is a woman being chased by a "Steve" zombie. (a david with a smaller head, a blue jacket, more health and the fact that he "karate chops" you) After killing the Steve, you will turn to the left to see a man being attacked by another Steve and two Davids. On saving him, he will show you the way out of the garden of the library, on letting him be killed by the zombies, They will turn around and attack you. The woman is seen crying behind James and Gary. James or Gary states that they couldn't help the man even though they clearly could, but chose not to.[[File:Unlucky_Guy.png|thumb|man being attacked]] |
| − | In the next scene, a Steve and two Davids burst through the glass double - doors to the left of them. After killing the Davids and Steve, you go through the double doors and find a fountain full of frogs who (of course) attack you. (Note that the frogs take ONE HIT to die; just like the murrers later in the chapter) After killing the frogs, you will turn around and find a Johnny and David and (of course) you (maybe) kill them. |
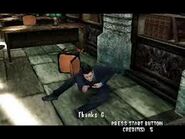
+ | In the next scene, a Steve and two Davids burst through the glass double - doors to the left of them. After killing the Davids and Steve, you go through the double doors and find a fountain full of frogs who (of course) attack you. (Note that the frogs take ONE HIT to die; just like the murrers later in the chapter) After killing the frogs, you will turn around and find a Johnny and David and (of course) you (maybe) kill them.[[File:Chapter_1_Davids.png|thumb|double doors scene |
| + | ]] |
||
| − | This is the scene when James will see G's bloodstains on the wall. Through a grating come the murrers who are small mutants worm - type zombies. Alike the frogs from the fountain, the murrers take one hit to go down. This is also the scene where the players meet "Max"; the strongest zombie in the level. (There was a mistake you see as the Max appears before the murrers) |
+ | This is the scene when James will see G's bloodstains on the wall. Through a grating come the murrers who are small mutants worm - type zombies. Alike the frogs from the fountain, the murrers take one hit to go down. This is also the scene where the players meet "Max"; the strongest zombie in the level. (There was a mistake you see as the Max appears before the murrers) |
In this scene, you will look up and see that a Johnny is throwing axes at you and you will also meet Ebitan, who has made a comeback from the first game... (1996) After killing the three zombies, (there are 2 Ebitans) a small boy opens a door while running away from 2-3 Johnnys and after killing the Johnnys you will come across a man - hole where two Randy's appear... |
In this scene, you will look up and see that a Johnny is throwing axes at you and you will also meet Ebitan, who has made a comeback from the first game... (1996) After killing the three zombies, (there are 2 Ebitans) a small boy opens a door while running away from 2-3 Johnnys and after killing the Johnnys you will come across a man - hole where two Randy's appear... |
||
| Line 17: | Line 18: | ||
This scene features the final savable civilian and a hidden Golden Frog in one of the two barrels you can see from the end of the last scene. (Note that the barrels take two hits instead of one) This scene features possibly the most zombies that aren't murrers or frogs where the zombies usually decide to ambush you from the bridges above... when helping the civilian, you must do two things; destroy a Steve's barrel and kill a David to save her. This is the first civilian to give you a life up if you save her so you better be a good shot... |
This scene features the final savable civilian and a hidden Golden Frog in one of the two barrels you can see from the end of the last scene. (Note that the barrels take two hits instead of one) This scene features possibly the most zombies that aren't murrers or frogs where the zombies usually decide to ambush you from the bridges above... when helping the civilian, you must do two things; destroy a Steve's barrel and kill a David to save her. This is the first civilian to give you a life up if you save her so you better be a good shot... |
||
| − | The final scene of each level in the series (apart from Bio Plant/Lab in THOTD3) is of course the boss scene where, in this case, you will fight Kuarl and Zeal who make up The Judgement; a giant axe wielding zombie with no head and an intelligent zombie who |
+ | The final scene of each level in the series (apart from Bio Plant/Lab in THOTD3) is of course the boss scene where, in this case, you will fight Kuarl and Zeal who make up The Judgement; a giant axe wielding zombie with no head and an intelligent zombie who can talk, mocks you throughout the level and bears a slight resemblance to The Hangedman from THOTD1. (you can read more about Zeal and Kuarl in their wiki page) |
This chapter has a maximum amount of civilians who can be saved, in this case; 5. If you do not save 5 civilians, you will not get an end - of -level life (this applies for both of the players, as in they will both get a life if all the civilians are saved) |
This chapter has a maximum amount of civilians who can be saved, in this case; 5. If you do not save 5 civilians, you will not get an end - of -level life (this applies for both of the players, as in they will both get a life if all the civilians are saved) |
||
| Line 25: | Line 26: | ||
* Steve |
* Steve |
||
* Johnny |
* Johnny |
||
| − | * Frog |
+ | * Frog Zombie |
* Murrer |
* Murrer |
||
* Max |
* Max |
||
| Line 32: | Line 33: | ||
* Zeal |
* Zeal |
||
* Kuarl |
* Kuarl |
||
| + | <gallery> |
||
| + | Unlucky Guy.png|A man being attcked by Davids |
||
| + | Chapter 1 Davids.png|The Double - Doors Scene |
||
| + | Johnnys.png|Johnny's Debut In The Game |
||
| + | G THOTD2.jpg|Players Talking To An Injured G |
||
| + | </gallery> |
||
Revision as of 10:25, 23 September 2014

G in chapter 1
At the start of the level you will find either 2 or 3 "david" zombies. (the amount of zombies relies on how many players playing currently) Then you will go into the library where G told them (James and Gary) to meet him. It doesn't look like G is there until you defeat 5 or 6 zombies and the players move further into the library. G is always found wounded, crouching behind a desk. As G is handing over his "file", (his guide to all the bosses) an axe zombie bursts through the door and attacks them.

Johnnys in Chapter 1
After defeating the "axe zombie", (johnny) you go outside the library when you find you find yet another "johnny" zombie killing a civillian. (note that the civillian cannot be saved) You can also see a david zombie in the background, it can be killed using one bullet only. After killing the civillian, The Johnny zombie attacks you and after killing him, (Johnny) the civilian he kills makes one final quote stating that he doesn't want to die. Though he dies a second later...
This part makes you start having to save civillians from zombies. The first one is a woman being chased by a "Steve" zombie. (a david with a smaller head, a blue jacket, more health and the fact that he "karate chops" you) After killing the Steve, you will turn to the left to see a man being attacked by another Steve and two Davids. On saving him, he will show you the way out of the garden of the library, on letting him be killed by the zombies, They will turn around and attack you. The woman is seen crying behind James and Gary. James or Gary states that they couldn't help the man even though they clearly could, but chose not to.

man being attacked
In the next scene, a Steve and two Davids burst through the glass double - doors to the left of them. After killing the Davids and Steve, you go through the double doors and find a fountain full of frogs who (of course) attack you. (Note that the frogs take ONE HIT to die; just like the murrers later in the chapter) After killing the frogs, you will turn around and find a Johnny and David and (of course) you (maybe) kill them.

double doors scene
This is the scene when James will see G's bloodstains on the wall. Through a grating come the murrers who are small mutants worm - type zombies. Alike the frogs from the fountain, the murrers take one hit to go down. This is also the scene where the players meet "Max"; the strongest zombie in the level. (There was a mistake you see as the Max appears before the murrers)
In this scene, you will look up and see that a Johnny is throwing axes at you and you will also meet Ebitan, who has made a comeback from the first game... (1996) After killing the three zombies, (there are 2 Ebitans) a small boy opens a door while running away from 2-3 Johnnys and after killing the Johnnys you will come across a man - hole where two Randy's appear...
Randy is a small crawler zombie with a lot of armour and a claw. (Alike the monkey zombies from THOTD1) Randy tends to climb on walls and often he will just leap at you. They can take a few hits, like the Davids, he can take a few hits anywhere but his head to kill him. (If you hit his head, his mask will fall of and he will disappear into a puddle of blood)
This scene features the final savable civilian and a hidden Golden Frog in one of the two barrels you can see from the end of the last scene. (Note that the barrels take two hits instead of one) This scene features possibly the most zombies that aren't murrers or frogs where the zombies usually decide to ambush you from the bridges above... when helping the civilian, you must do two things; destroy a Steve's barrel and kill a David to save her. This is the first civilian to give you a life up if you save her so you better be a good shot...
The final scene of each level in the series (apart from Bio Plant/Lab in THOTD3) is of course the boss scene where, in this case, you will fight Kuarl and Zeal who make up The Judgement; a giant axe wielding zombie with no head and an intelligent zombie who can talk, mocks you throughout the level and bears a slight resemblance to The Hangedman from THOTD1. (you can read more about Zeal and Kuarl in their wiki page)
This chapter has a maximum amount of civilians who can be saved, in this case; 5. If you do not save 5 civilians, you will not get an end - of -level life (this applies for both of the players, as in they will both get a life if all the civilians are saved)
Zombies
- David
- Steve
- Johnny
- Frog Zombie
- Murrer
- Max
- Ebitan
- Randy
- Zeal
- Kuarl


