No edit summary |
|||
| Line 5: | Line 5: | ||
==Story== |
==Story== |
||
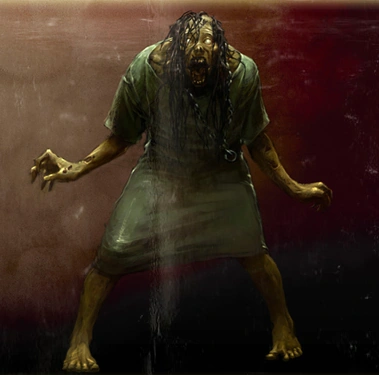
[[File:Screamer Concept Art.png|thumb|120px|left|Concept art]] |
[[File:Screamer Concept Art.png|thumb|120px|left|Concept art]] |
||
| − | In the cut-scene introduction to |
+ | In the cut-scene introduction to Ballistic Trauma, we see Papa Caesar on his mobile phone telling someone that Detective Washington and his associate (Agent G) are on their way to the hospital. Papa Caesar explains to the person on the phone that he has a plan to eliminate any evidence of their evil plot. Here we see the Screamer suspended in a large tube of liquid. |
| − | Throughout the level the Screamer can be seen stalking the players throughout the hospital, randomly popping up in various windows and peering through certain doorways. During these 'cameos' the Screamer cannot be harmed nor can she harm the players. |
+ | Throughout the level, the Screamer can be seen stalking the players throughout the hospital, randomly popping up in various windows and peering through certain doorways. During these 'cameos', the Screamer cannot be harmed, nor can she harm the players. |
At the end of Ballistic Trauma, the Screamer is faced by our heroes in the bowels of the hospital in an empty, partially flooded operating theatre. |
At the end of Ballistic Trauma, the Screamer is faced by our heroes in the bowels of the hospital in an empty, partially flooded operating theatre. |
||
| − | In the 'Director's Cut' version of the level, Detective Washington and Agent G encounter the |
+ | In the 'Director's Cut' version of the level, Detective Washington and Agent G encounter the Screamer prior to the actual fight. She is crouched in the corner of a dark corridor in the hospital, and when they approach her, she stands up and displays her not-so-lovely singing voice - smashing windows and sending our heroes across the corridor into unconsciousness. |
==Battle== |
==Battle== |
||
===Tactics=== |
===Tactics=== |
||
| − | Weakpoints:Head and |
+ | Weakpoints:Head and crotch |
[[File:Screamer.jpg|thumb|The Screamer doing what she does best]] |
[[File:Screamer.jpg|thumb|The Screamer doing what she does best]] |
||
| ⚫ | Throughout the battle, the Screamer employs a variety of tactics to damage the players. First, she simply scuffles quickly from one side of the theater to the other and, if allowed to get too close, will grab on to the players and begin to assault them with a point-blank sonic blast. In order to break free of her grip, players must frantically shake their Wii |
||
| + | |||
| ⚫ | Secondly, the Screamer will summon four zombie nurses, and through teleportation (or perhaps possession) she will rapidly switch places with each one. Players must wait until the Screamer stops moving in order to attack, for if they shoot a zombie nurse instead the boss will get a free swipe that cannot be repelled. |
||
| ⚫ | Throughout the battle, the Screamer employs a variety of tactics to damage the players. First, she simply scuffles quickly from one side of the theater to the other and, if allowed to get too close, will grab on to the players and begin to assault them with a point-blank sonic blast. In order to break free of her grip, players must frantically shake their Wii remotes. |
||
| + | |||
| ⚫ | Secondly, the Screamer will summon four zombie nurses, and through teleportation (or perhaps possession) she will rapidly switch places with each one. Players must wait until the Screamer stops moving in order to attack, for if they shoot a zombie nurse instead, the boss will get a free swipe that cannot be repelled. |
||
Finally, the Screamer will summon zombie doctors and will shamble towards you, hiding behind them, essentially using them as mutant shields. |
Finally, the Screamer will summon zombie doctors and will shamble towards you, hiding behind them, essentially using them as mutant shields. |
||
Revision as of 05:15, 11 July 2011
Weakpoint: Head and crotch

Screamer CG render
The Screamer is the boss character for the Ballistic Trauma level of The House of the Dead: Overkill.
Story
Concept art
In the cut-scene introduction to Ballistic Trauma, we see Papa Caesar on his mobile phone telling someone that Detective Washington and his associate (Agent G) are on their way to the hospital. Papa Caesar explains to the person on the phone that he has a plan to eliminate any evidence of their evil plot. Here we see the Screamer suspended in a large tube of liquid.
Throughout the level, the Screamer can be seen stalking the players throughout the hospital, randomly popping up in various windows and peering through certain doorways. During these 'cameos', the Screamer cannot be harmed, nor can she harm the players.
At the end of Ballistic Trauma, the Screamer is faced by our heroes in the bowels of the hospital in an empty, partially flooded operating theatre.
In the 'Director's Cut' version of the level, Detective Washington and Agent G encounter the Screamer prior to the actual fight. She is crouched in the corner of a dark corridor in the hospital, and when they approach her, she stands up and displays her not-so-lovely singing voice - smashing windows and sending our heroes across the corridor into unconsciousness.
Battle
Tactics
Weakpoints:Head and crotch
The Screamer doing what she does best
Throughout the battle, the Screamer employs a variety of tactics to damage the players. First, she simply scuffles quickly from one side of the theater to the other and, if allowed to get too close, will grab on to the players and begin to assault them with a point-blank sonic blast. In order to break free of her grip, players must frantically shake their Wii remotes.
Secondly, the Screamer will summon four zombie nurses, and through teleportation (or perhaps possession) she will rapidly switch places with each one. Players must wait until the Screamer stops moving in order to attack, for if they shoot a zombie nurse instead, the boss will get a free swipe that cannot be repelled.
Finally, the Screamer will summon zombie doctors and will shamble towards you, hiding behind them, essentially using them as mutant shields.
After the Battle
When she falls, G and Washington hear a distinctive ring. Washington tells G to answer the call, but G says it's not his phone. They then realize that the sound is coming from inside the Screamer. The two agents promptly lift her corpse onto a nearby operating table, and argue over which of them should retrieve the phone. G finally decides to (after finding out Washington just recently got a manicure) and pulls a cellphone from inside the Screamer's body. The call is from Papa Caesar and meant for Washington. After a short conversation, G and Washington realize the building is set to blow up and promptly escape. Outside, they meet up with Varla Guns and the three ride away on her motorcycle.
| v • e | |||
|---|---|---|---|